
I’m not a professional or amateur photographer (ahem, or even a hobbyist), however, I wanted to see if it was even remotely possible to take some decent photos of my socket labels.
I determined I would find a way to use what photo equipment I had lying around and what tips I could dig up on Google. After a lot of searching and a little bit of experimentation I compiled these simple steps that I hope you may find useful (or at the very least, entertaining).
Step 1: The Camera
The camera I had available to use for this project was an old Coolpix P500. Definitely not something fancy or expensive. If you have a nice camera, by all means, make use of it. You could even get some good shots with a phone camera. Just get started with whatever you have handy and see what happens.

Step 2: The Tripod
I didn’t want to deal with any blurriness. Luckily I had a tripod to help with that. It wasn’t an expensive one but still made a big difference in image sharpness. Plus, because of some of the camera settings I’ll be discussing later, the tripod would become even more important. If you don’t have a tripod, stack up some books or other objects to set your camera on.

Step 3: Lighting
Natural sunlight is the best for just about any kind of photo. I opted for an outdoor setting to take advantage of the nice, sunny morning we were having on the day of my “experiment.”
The setup was in an “open shaded” location in order to avoid any harsh, direct sunlight. One of my aims was for soft shadows not defined, hard shadows. You could also set up in a room with nice, big windows, letting in lots of light. Just avoid direct sunlight.

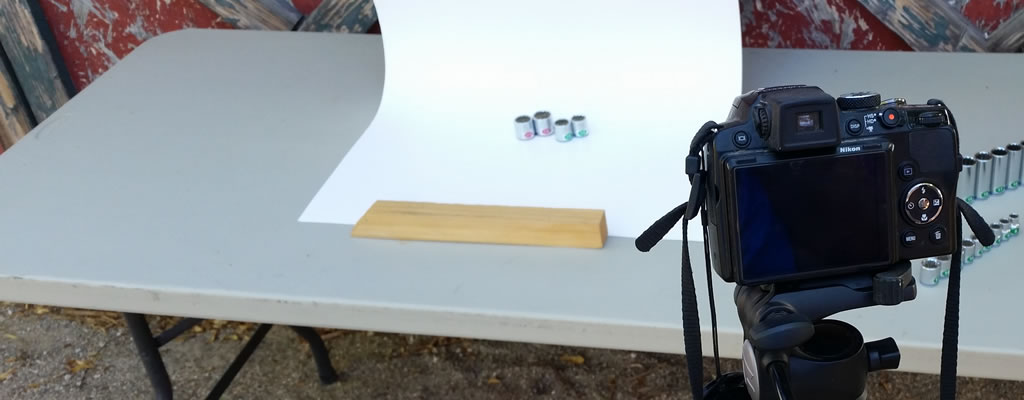
Step 4: The Background
You could (and should) try out photographing your labels in various settings, but I wanted to experiment with a pure white background and try for that “product picture” look. Creating my own backdrop was pretty easy by using some mat board I had laying around.
I also wanted to have the focus of the photo to be exclusively on the labels so I opted for a curved background in it to hide the horizon lines. I placed a container behind the mat board holding up one edge creating a sweeping bend.

Step 5: Clean Them Up
Dust and fingerprints really showed up in my test photos so I broke out the rubbing alcohol and cotton cloth and worked over my sockets, wiping everything down. Afterward, I continued to handle the sockets with the cloth so as to avoid re-adding telltale smudges.

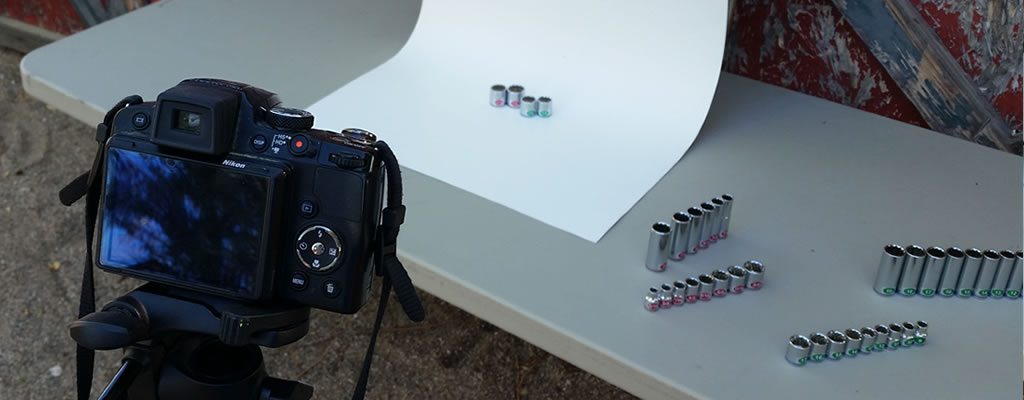
Step 6: Different Angles
I moved my camera all around looking for good angles. Some items you photographic will look better from above or from the side or a 45 degree angle. Try moving around and taking photos at various angles. Even try close ups and unique viewpoints. Sometimes those shots turn out the best so try different options.
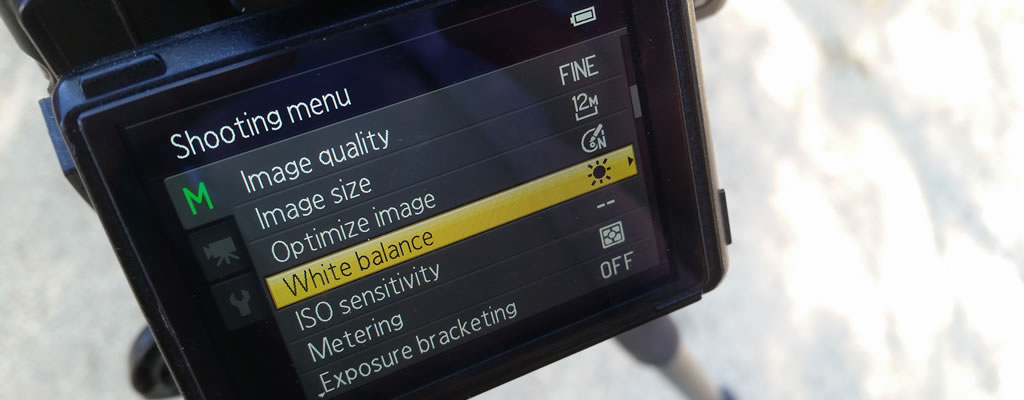
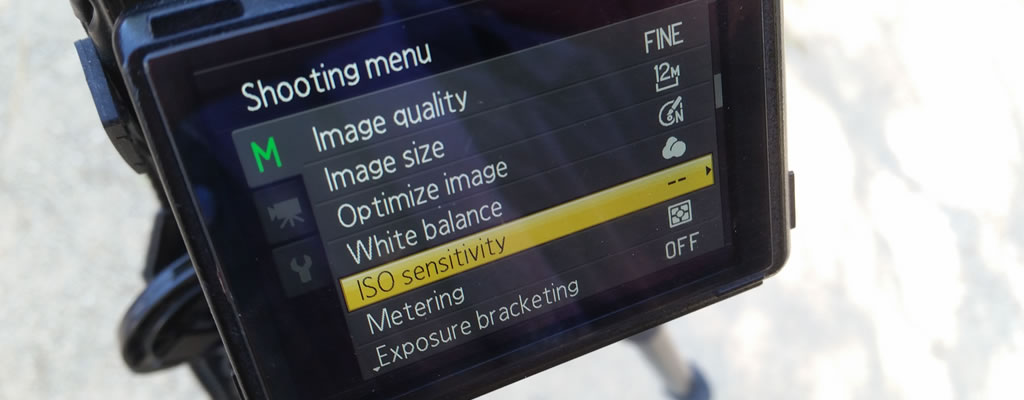
Step 7: Camera Settings
Now it was time to dive into my camera’s manual and wade through what looked like a thousand different settings. It wasn’t as bad as it sounds, just a few changes that made a big difference.
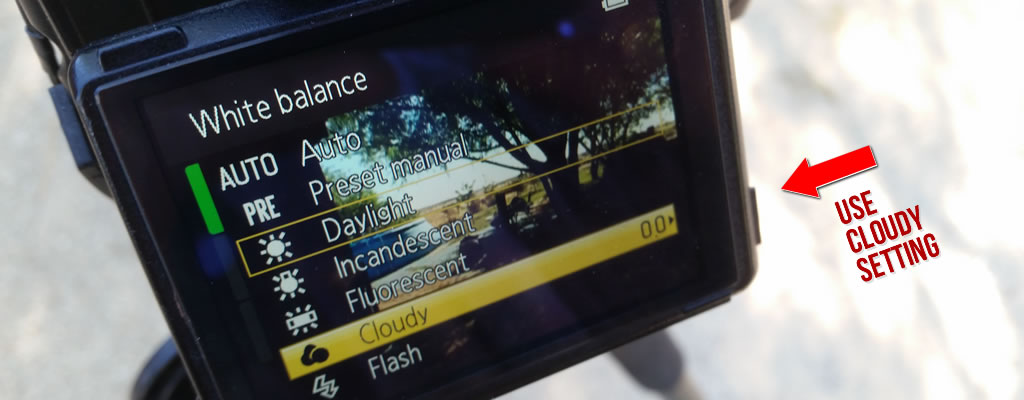
Step 7.1: White Balance
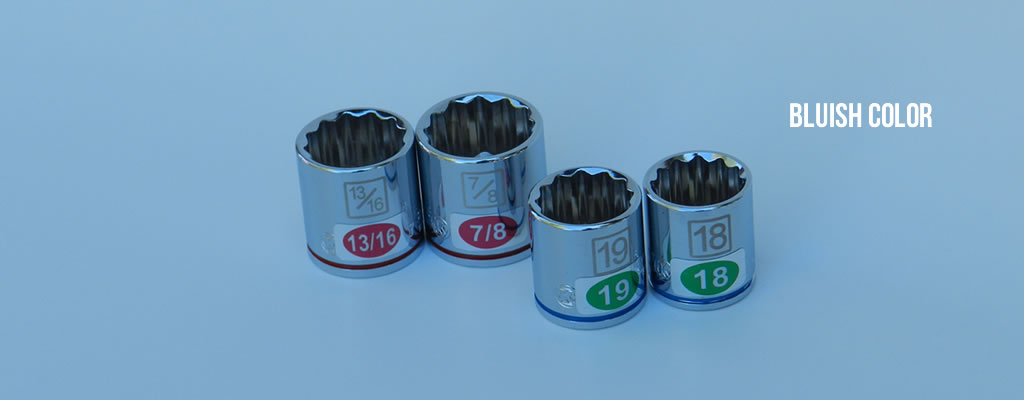
I set the white balance to cloudy. It was great for adding warmth to my photos. My choice for an outdoor open-shade location meant my pics were turning out bluish. The white balance helped to alter the color to create a warmer photograph.

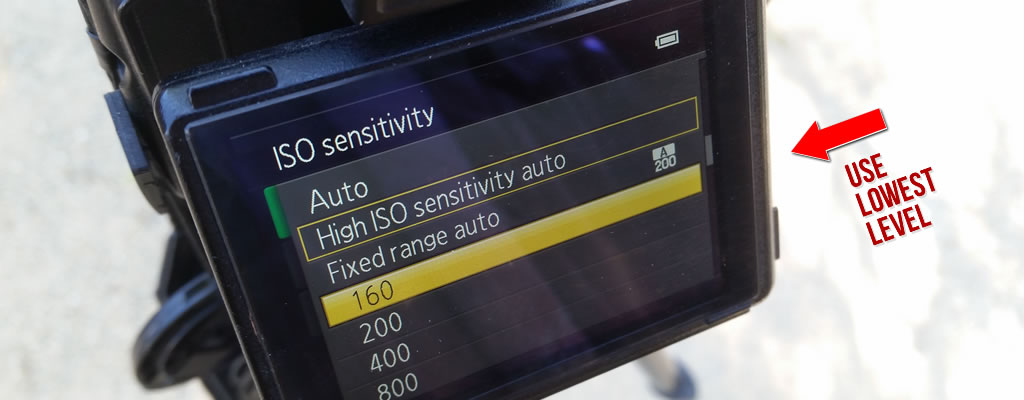
Step 7.2: ISO
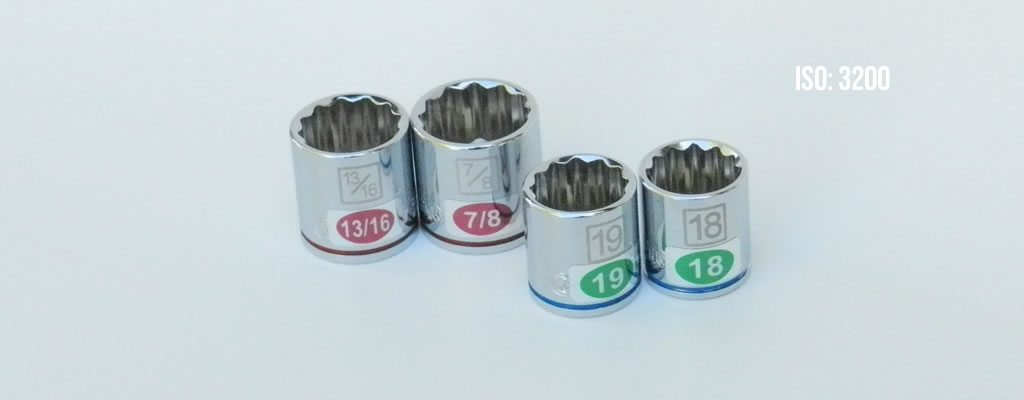
I set the ISO Sensitivity to the lowest level. This meant a lower shutter speed which meant less noise, creating an overall sharper picture. Because I was using a tripod I didn’t need to worry about a fast shutter speed so I set my camera to ISO 160.

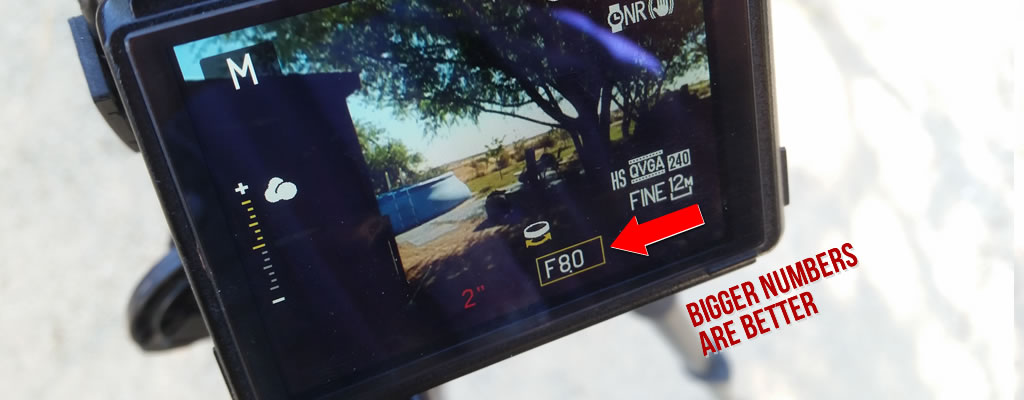
Step 7.3: Aperture
Setting a small aperture can add depth of field. It’s sounds backwards but the largest f/ number is the smallest aperture. Use the setting that seems the sharpest to you (which may or may not be the highest number so you’ll have to experiment). In my case I couldn’t tell much of a difference, until looking closely at a photograph comparison. The F/8.0 setting did provide the clearest image.

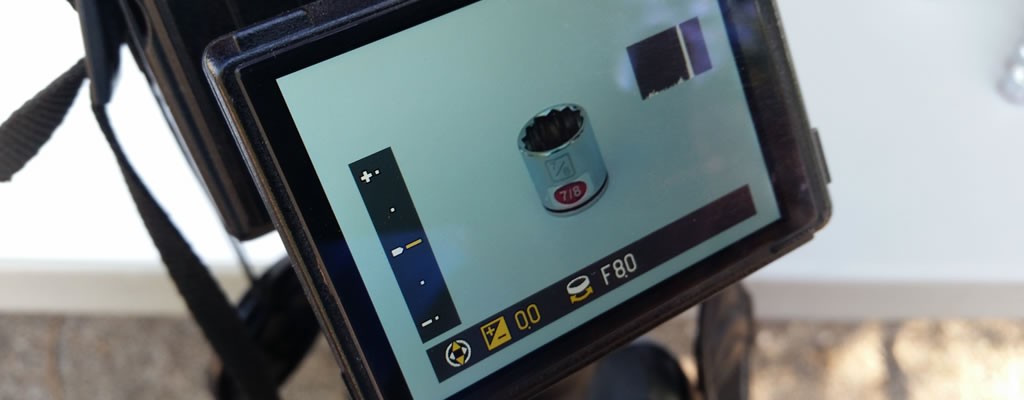
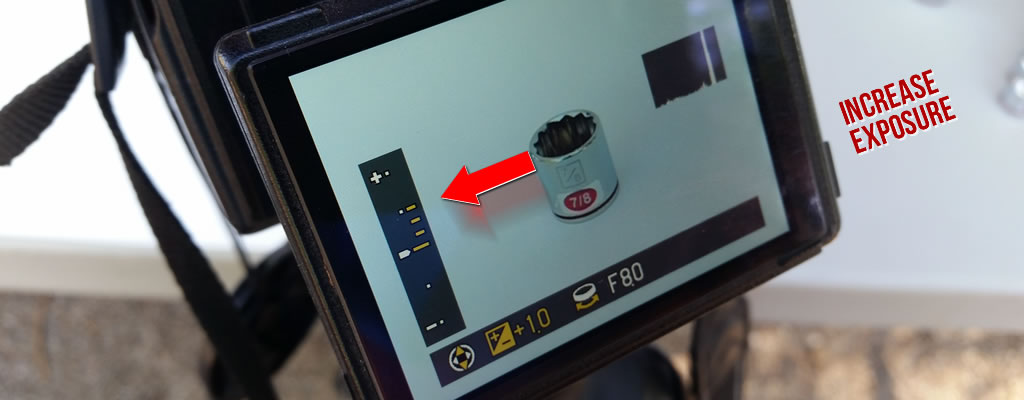
Step 7.4: Exposure
The bright white background was causing me problems with the exposure. I played around with the exposure histogram allowing it to over-expose so my background didn’t turn grey. Once again you’ll have to experiment to see what setting works for you.


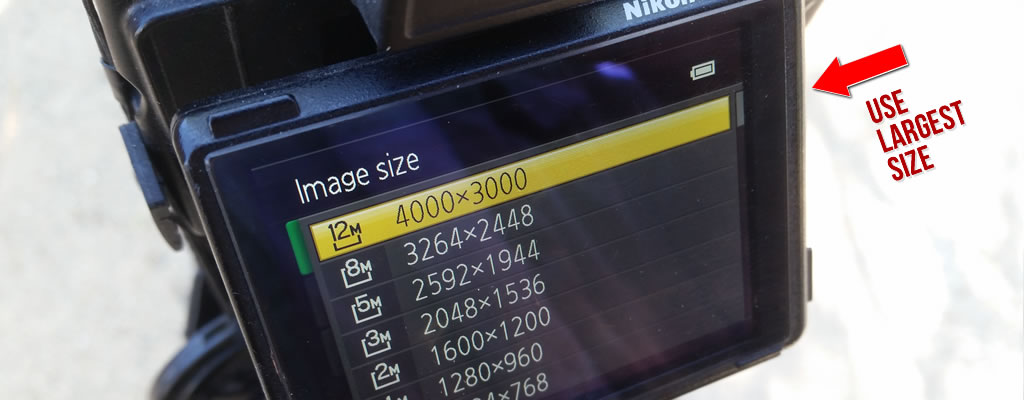
Step 7.5: Image Size
You always want to get the largest image size possible. You can always shrink an image down to the size you need but enlarging an image leads to “pixelation”.
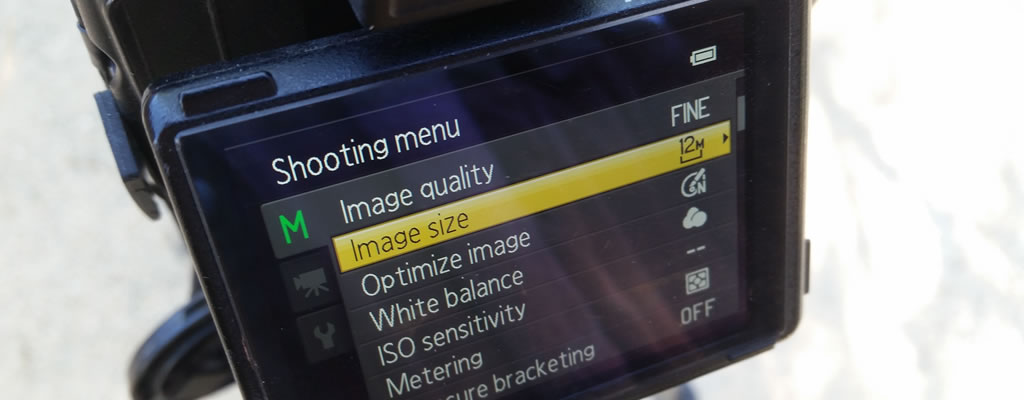
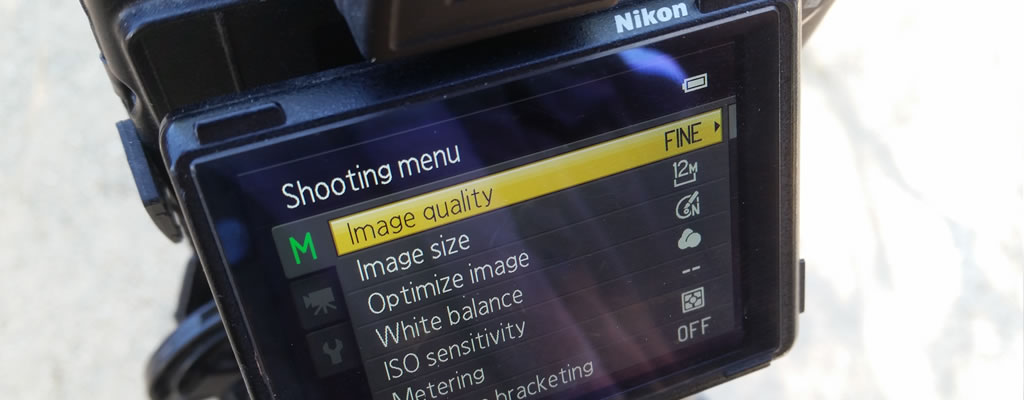
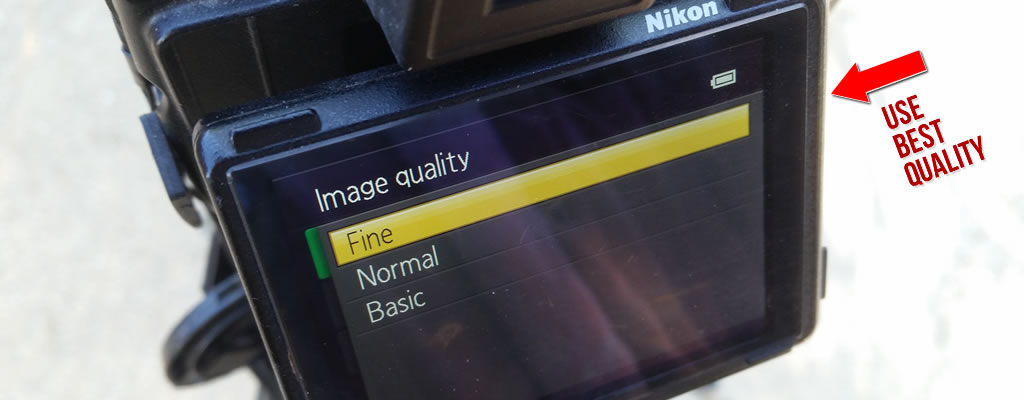
Step 7.6: Image Quality
Look for the finest setting your camera has. This, in a sense, “packs” the pixels into your photos. The more, the better.
Step 7.7: Self-Timer
Now that my settings were the way I wanted them, I had to set the timer to avoid any shakes and tremors. My camera had a 2 second delay which was great. I didn’t seem like I was constantly waiting around for a picture to take.

Step 8: Post Processing
There is so much that can be done with touching up photos and there are endless tutorials that can be found for that. Here’s a few quick tips I learned.
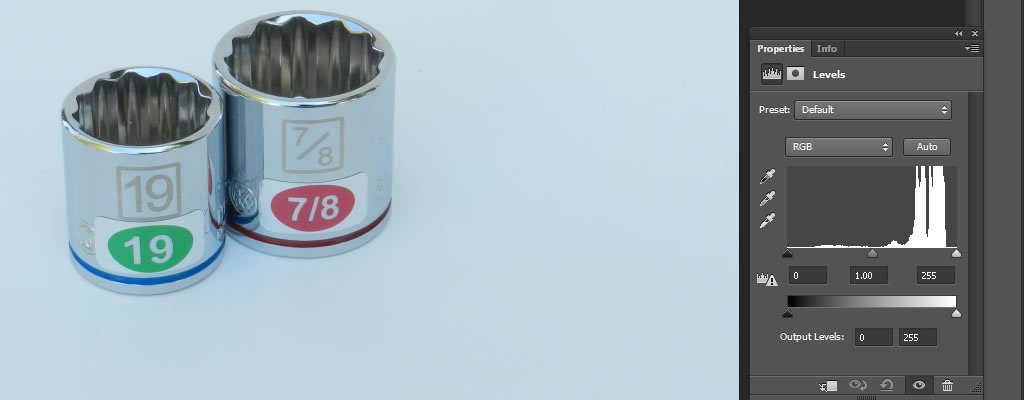
Step 8.1: Background Color Correction
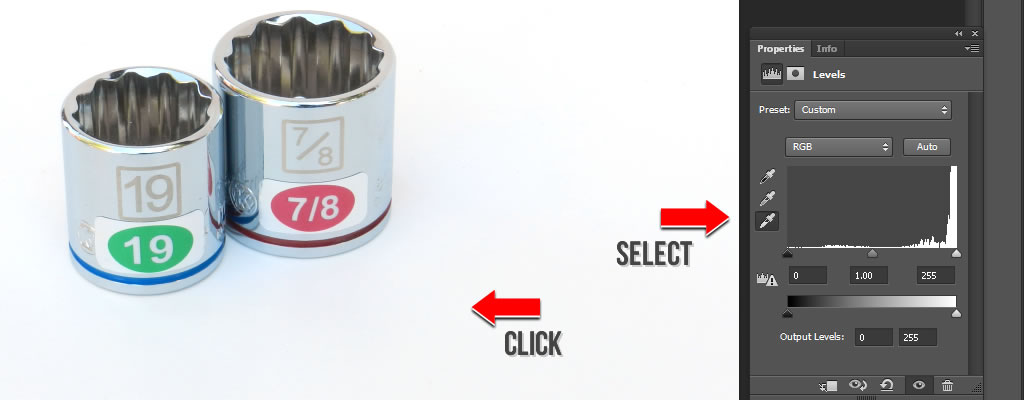
If you have Photoshop (if not, download Gimp free), go to the Adjustments Panel and click the Levels icon. A properties panel opens up. Click the White Point Eye Dropper (bottom one) then click the darkest part of your background (that you want to be white). Presto, you have a nice white background.
Step 8.2: Cropping
This is a way to easily center your subject and get rid of all the extra areas in your photograph.

Step 8.3: Hue/Saturation
You can also play around with the hue and saturation to make the colors a little more vibrant. Be careful though. It’s easy to add too much. With my photo I just added +4 and +5.

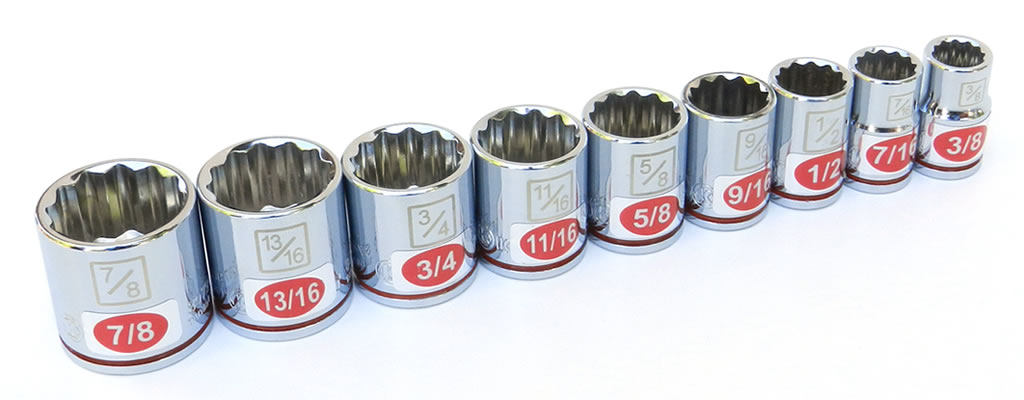
Final Images


Go For It
Half the challenge is just getting started. Probably the hardest part was digging through that stupid manual to find the settings. But as they say at Nike, Just Do It. Don’t be a afraid to experiment, to try being creative. Sure you’ll make a few mistakes and take a few bad pics (but your camera’s delete button works great.) And some of those photos you take will leave you thinking “wow, that’s not bad.” Plus you’ll have learned a few handy, new tricks with your camera and maybe even stumbled onto a new, future hobby.
Good luck!
Leave A Comment